RoboSIM

Frequently Asked Questions


Welcome to the Section
RoboSIM - Frequently Asked Questions

In this section, divided by topic, you'll find answers to the most frequently asked questions that will help you to face up to the training course: Use and Programming.

If you don't find the answer to your problem, you can ask for help our technical support team by sending an e-mail to the following address: admin@comauwebacademy.com

FAQ

RoboSIM installation


Frequently Asked Questions

BIOS (an acronym for Basic Input-Output System), in case you didn't know, is software that resides on a chip put on the motherboard of the computer, that contains within it all the instructions for starting the system and ensuring the hardware and software that make up the PC can communicate with each other. To access it, you just put a simple procedure that's within anyone's grasp into practice.
To be able to enter the BIOS of Windows 10, or rather to access the UEFI (starting from Windows 8.xe, proving that even in Windows 10, BIOS has evolved and turned into UEFI), you can perform one of two different sets of actions. You can access it when the computer is on, by going to system settings and calling up a special function, or you can do so when the PC is booted, using a special key combination. Which of the two modalities you choose is a decision that obviously belongs to you and you alone, depending on what are your preferences and current requirements are. The UEFI screen that you then find yourself in front of is obviously the same in both cases. Find out how to proceed either way below.

From Windows 10
The first fundamental step you need to take is to click on the Start button (the Windows flag located in the lower left corner of the screen) and select Settings (the gears icon) from the menu that opens. Once you've done that, click on the Updates and Security icon in the opened window, choose the Restore item from the sidebar on the left and click on the Restart button, which is located under the heading Advanced Start. Then wait a few seconds and the menu will appear, with the options to reboot and restore the system, and select the following icons: Troubleshooting, Advanced Options and UEFI Firmware Settings. Finally, click on the Restart button and wait a few seconds, until the computer has restarted. Once it's restarted, your Windows 10 PC will automatically go into the UEFI configuration menu.

When the PC is booted
Turn on your computer and as soon as you see the first screen with the Windows logo, press it immediately and continue to hold the F2 key or the Delete key on the keyboard down for a while. Later you'll yourself in front of the UEFI configuration screen.
If the indicated key combination proves ineffective, try replacing the F2 or Del keys with F6 or F10. If you can't even access the BIOS of your Windows 10 PC, try taking a look at the computer user manual, or see if the right combination of keys to be used is indicated during the PC start-up phase, in the first screen that appears after pressing the computer power button and before pressing the system logo. The information is generally reported in the lower left part of the screen. If unfortunately the instructions I've just given prove inaccurate or in any event, if you think you need more details, I suggest you take a look at dedicated support and assistance section of your company's Internet site on your computer. You're sure to find the answers to your questions there.

Source: Aranzulla.it

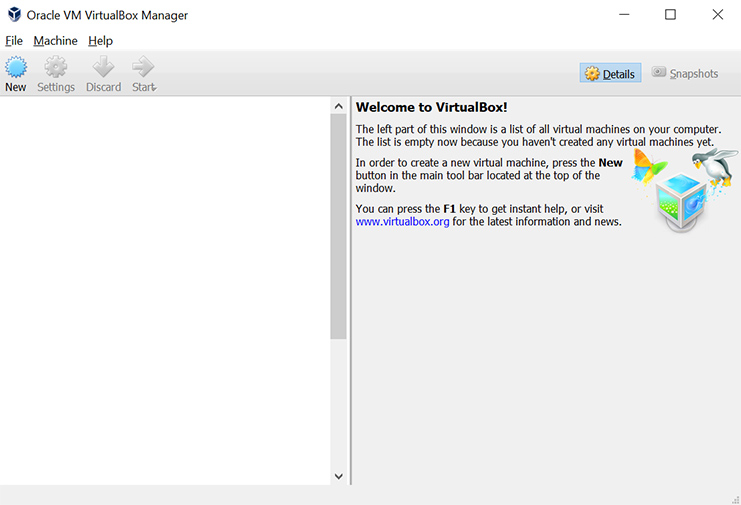
Check that Oracle VM VirtualBox is installed.


Check the Microsoft Visual C++ redistributable library.

Check that Oracle VM VirtualBox is installed.


Verify the presence of the virtual machine created in Oracle VM VirtualBox.

Check that Oracle VM VirtualBox is installed.


Verify the presence of the virtual machine created in Oracle VM VirtualBox.


Check whether the virtual machine is ready.


Verify that there are no blocks by firewalls or anti-virus.


Check the settings for the virtual network adapter from Windows.
To check, follow the procedure:

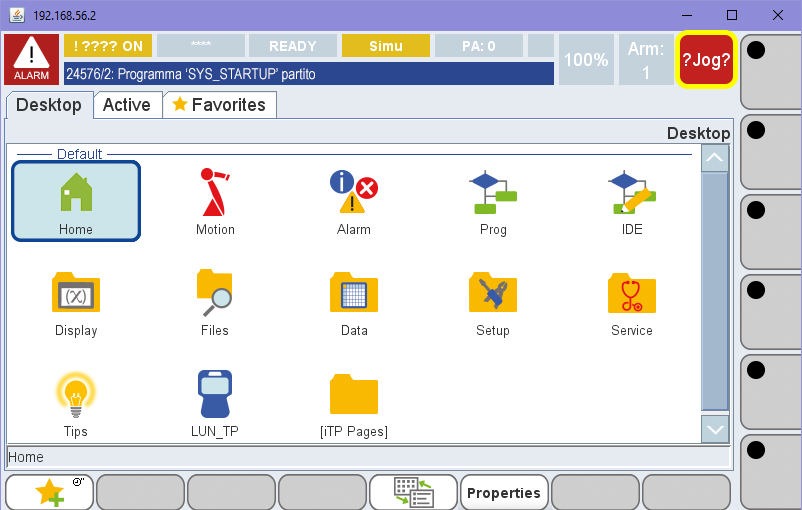
An index of this has a long stay with the script in red ?Jog? at the top right of the graphical interface.

?Jog?

Enable virtualisation features from BIOS.

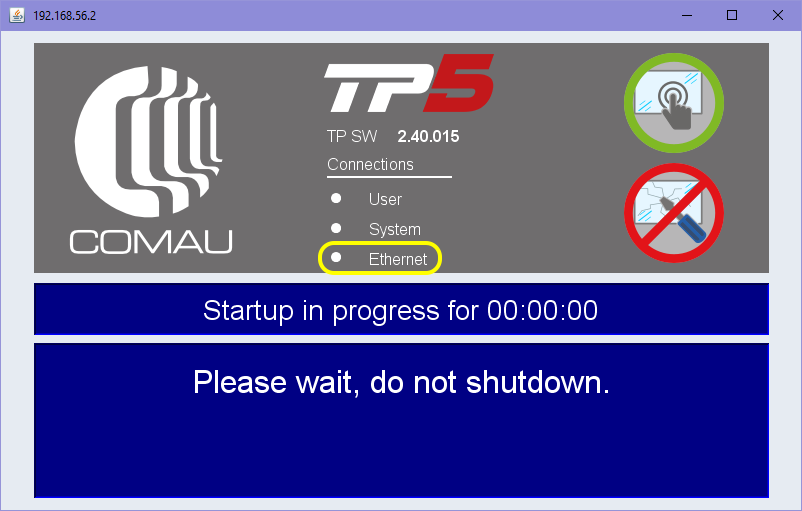
Avvio del sistema

Check the virtual network adapter settings.


Verify that there are no blocks by firewalls or anti-virus.

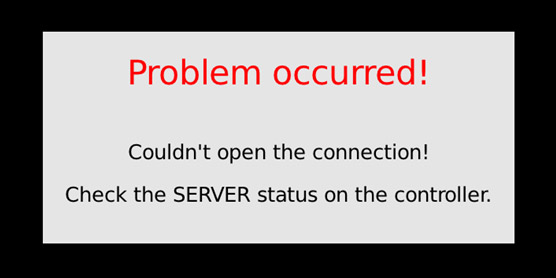
Once the display has started, if this screen appears:

Problem occurred

Check that you have correctly entered the virtual machine address in Visual3D.


Check the virtual network adapter settings.


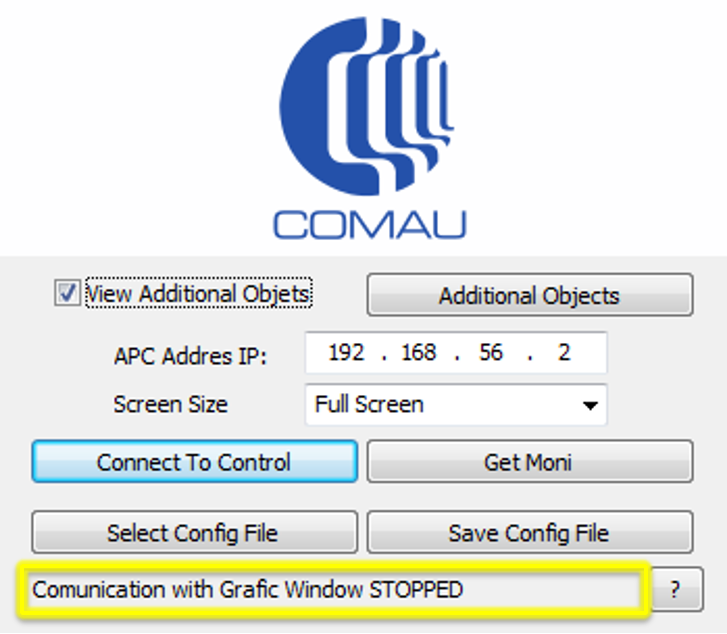
If, after pressing the Connect To Control button, the graphic environment is not displayed and the message "Communication with Grafic Window STOPPED" is shown:

Comunication with Grafic Window STOPPED

Perform a video card drivers update present on the current PC. In case you do not get better results and the operating system has recently applied updates, it is possible that the video card manufacturer has not yet published a suitable update.
Try again at a later date.
In the event that the video card manufacturer has not released a driver update after a long period of time or an urgent solution is needed, you can try to manually update .dll files on your PC.
To do this, it is necessary to search reliable online sources for the opengl32.dll file corresponding to the video card on your PC.
The file should be present on your PC. In the case of a 32bit (x86) operating system it will be in the C:\Windows\System32 folder; in the case of a 64bit (x64) operating system it will be both in the C:\Windows\System32 folder and in the C:\Windows\SysWOW64 folder.
You can check the version of this dll, both for the one currently present on your PC and the one possibly downloaded from the internet, in the following way: right-click on the opengl32.dll file, select the item from the Property menu, click on the Details tab and open the Version file.
If you decide to manually update the file: if your operating system is 32bit (x86), copy the file taken from the web to the C:\Windows\System32 folder, if your operating system is 64bit (x64), copy the file taken from the web both in the C:\Windows\System32 folder and in the C:\Windows\SysWOW64 folder.
In the event that the problem persists, it is possible to follow certain procedures to resolve errors related to this dll from reliable websites.


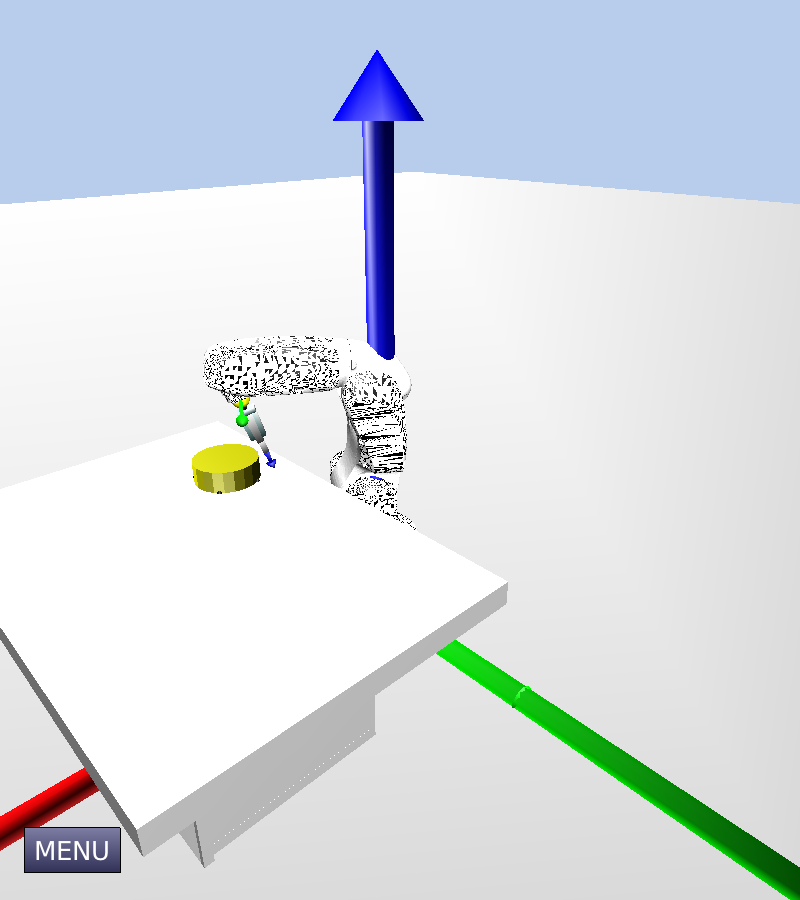
Once the visualisation has started, if the graphic environment looks similar to the following:

Ambiente grafico

Follow the previous solution: "If, after pressing the Connect To Control button, the graphic environment is not displayed and the message "Communication with Grafic Window STOPPED" is shown".

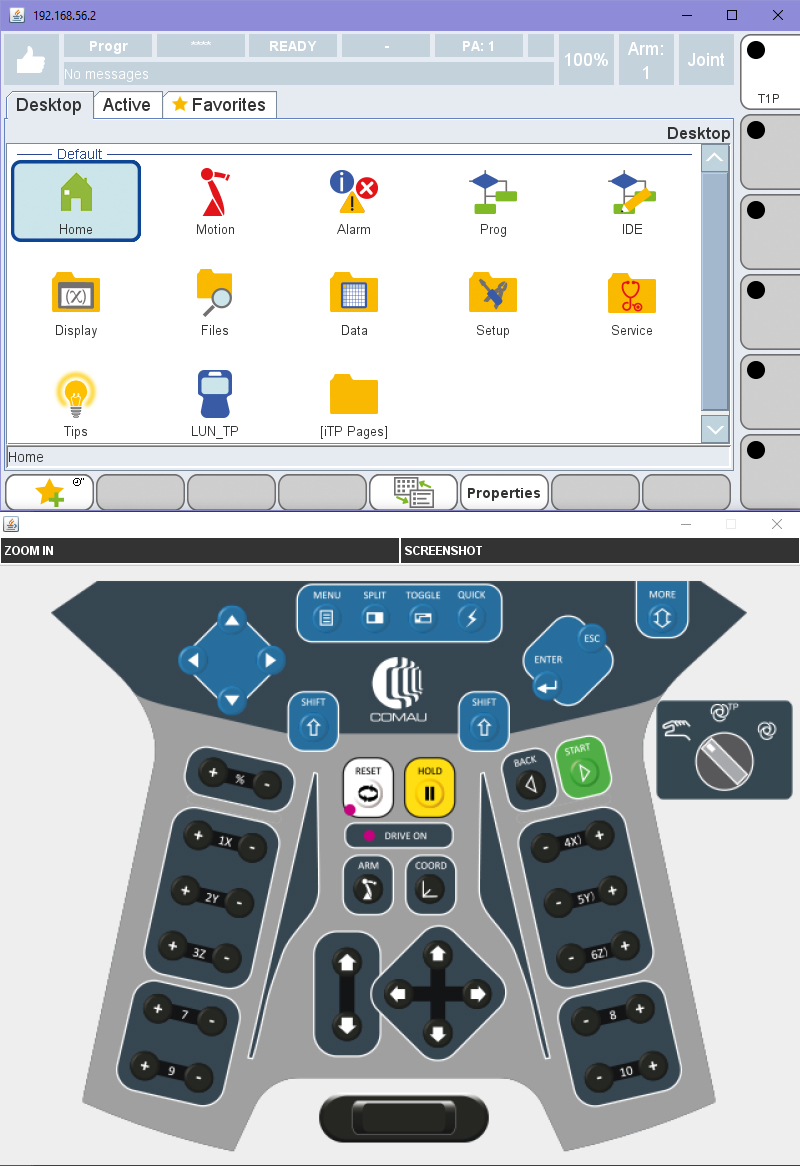
The screen resolution is too low; the recommended resolution is 1920 x 1080.
If you don't have this resolution, but only have lower resolutions, it is advisable to decrease keyboard size (ZOOM OUT) of the virtual TP using the ZOOM button which can be set to:
- ZOOM OUT: Minimum keyboard size
- ZOOM NORMAL: Average keyboard size
- ZOOM IN: Maximum keyboard size
- NO ZOOM: Hides keyboard

Zoom

Procedures / Answers

Watch the video RoboSIM installation from 10:17 minutes onwards.

Watch the video RoboSIM installation from 12:12 minutes onwards.

Watch the video RoboSIM installation from 00:15 minutes onwards.

Open ORACLE VM VirtualBox
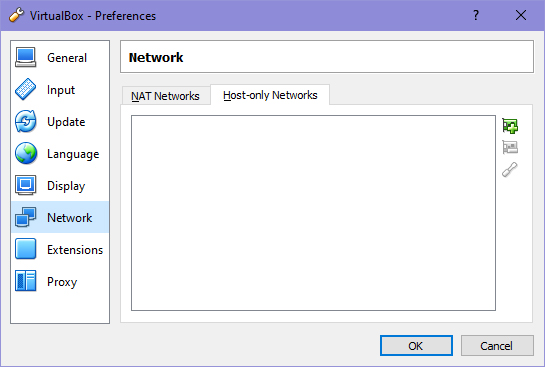
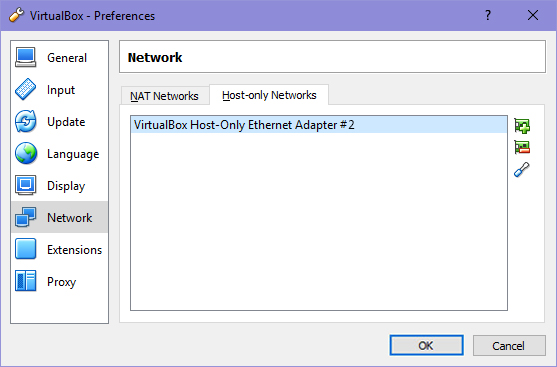
FilePreferencesNetwork (on left) → Only host networks (in right tab)
Is there a tab in the list or is it empty

If it is empty:

Click the button with the + symbol (on the right side of the window) and wait for it to be created. If an error is detected, it may be because that the PC user is not an administrator; re-run the procedure and start ORACLE VM VirtualBox as an administrator.
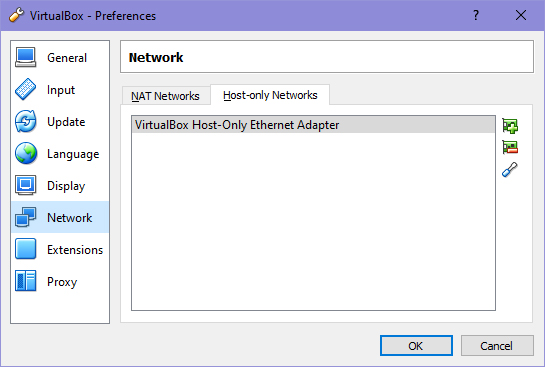
If a card named Virtual Box Host Only Ethernet Adapter #2 (or #3, #4, #5, etc) has been created, follow the solution:


If a card named Virtual Box Host Only Ethernet Adapter
is already present:

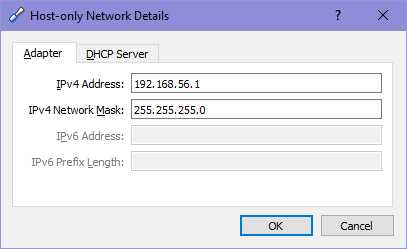
Select the card from the list (highlight it by selecting it with left mouse button) → click the button with the screwdriver symbol (on the right side of the window) → open a window with the card tab selected, and check the following parameters:

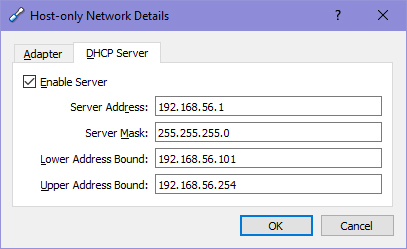
Then click on the DHCP Server tab, and check the following parameters:

Note:
If setting the parameters listed above is in conflict with a non-virtual network (e.g. Wi-FI or LAN), contact your network administrator. Alternatively, disconnect the PC from the network and then enter the settings and use RoboSIM and ORACLE in the absence of a connection to a real (non-virtual) network.
You can check the settings are correct from the Windows command prompt by using the PING command:
- check virtual card with PING 192.168.56.1
- check virtual machine with PING 192.168.56.2.


If a card named
Virtual Box Host Only Ethernet Adapter #2 (or #3, #4, #5, etc.):

ORACLE VM VirtualBox cannot create the Virtual Box Host Only Ethernet Adapter. In its settings, RoboSIM has a reference to a card named Virtual Box Host Only Ethernet Adapter.
Before continuing, follow the steps that were listed in the previous procedure “If a card named Virtual Box Host Only Ethernet Adapter is already present”.
Follow the solution:

To make settings valid for all virtual machines created in the future, follow the solution:

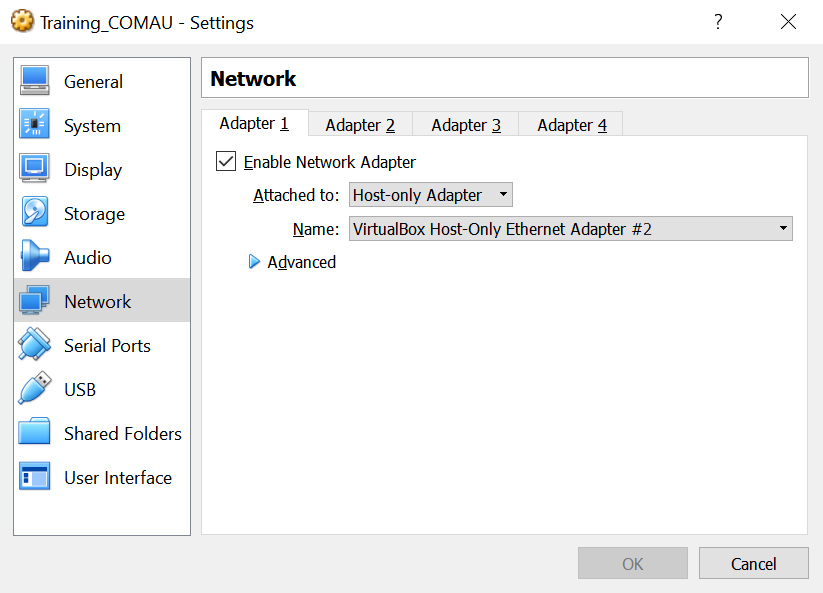
Open ORACLE VM VirtualBox and check the virtual card settings. Close the properties window to return to the main screen. In the virtual machines list (on the left), use the right mouse button to click on the virtual machine whose settings are to be corrected → select Settings → a window opens → click Network (on the left) → check that the following parameters are present in the tab Sheet 1:

Open the RoboSIM installation folder (for example C: \ Program Files (x 86) \ Comau \ RoboSIM \ Training_COMAU), where there are two files:
- Training_COMAU.vbox (.vbox extension may not be visible)
- Training_COMAU-disk1.vmdk (.vmdk extension may not be visible)

The Training_COMAU.vbox file is approximately 4 KB in size and it’s this file the fix is applied to.
Copy the Training_COMAU.vbox file onto the Desktop → open it using the right mouse button → open by → selecting a text editor from the programme list (we recommend Notepad ++ freeware).
Once opened, look for the following text:
HostOnlyInterface name="VirtualBox Host-Only Ethernet Adapter"
Change it to:
HostOnlyInterface name="VirtualBox Host-Only Ethernet Adapter #2"

Remember # 2 depends on the name of the existing card that you checked previously (if your card ends for example in # 3, you need to enter # 3).
Save the changes to the file keeping the original name and close the text editor.
Copy the modified file onto the Desktop and paste it into the RoboSim installation folder (for example C: \ Program Files (x 86) \ Comau \ RoboSIM \ Training_COMAU) and select Copy and Replace.
In this way, the setting with which the virtual machines will be created are modified, starting with Training_COMAU. All existing virtual machines must be corrected by following the steps listed in the answer to: How do I correct a virtual machine that's already been created?

Manually launch Oracle VM VirtualBox.

Does the program open and show its graphical interface correctly?

If it does not open:
Follow the solution: How to reinstall Oracle VM VirtualBox correctly (or follow the video, starting from 04:30 mins.).


If it opens:
Follow the solution: How to check the Microsoft Visual C ++ redistributable library

Uninstall RoboSIM and Oracle VM VirtualBox from:
Control Panel → Programs and Features.

Then proceed to re-install RoboSIM (as Administrator) with the correct version for your operating system.

Attention! You may have installed the wrong version of RoboSIM or have run the installation without administrator rights.

Is the most recently installed version is higher than 2010 and it's the correct version for your operating system? (32/64 bit)

YES
In some cases, although there is a more recent version of 2010 (for example, 2017), and the 2010 version is absent, 2010 has to be installed. To do this you need to:
stop all of the programs in use → uninstall the latest version → download from Microsoft the correct version for your operating system, either the 2010 version or the most recent version uninstalled → install the 2010 version → install the most recently removed version.


NO
Download the 2010 version from the Microsoft website (correct for your operating system) → install the 2010 version.

Open Oracle VM VirtualBox.
One or more virtual machines will appear in the list on the left called VM_COMAU_name assigned?

YES
Follow the solution:


NO
You have not created a virtual machine.
Watch the video RoboSIM installation starting from 06:42 minutes, or follow the solution:

How do you check if the virtual machine is ready?

You can check whether the virtual machine is ready by opening Oracle VM VirtualBox.

It may take several minutes to become ready but if it is capable of starting, no error will appear.

To check whether the machine is ready:
- launch the virtual machine using RoboSIM;
- open Oracle VM VirtualBox;
- select the virtual machine from the list on the left:
if the virtual machine shows the status below the name Off follow the procedure How to check virtual network card settings;
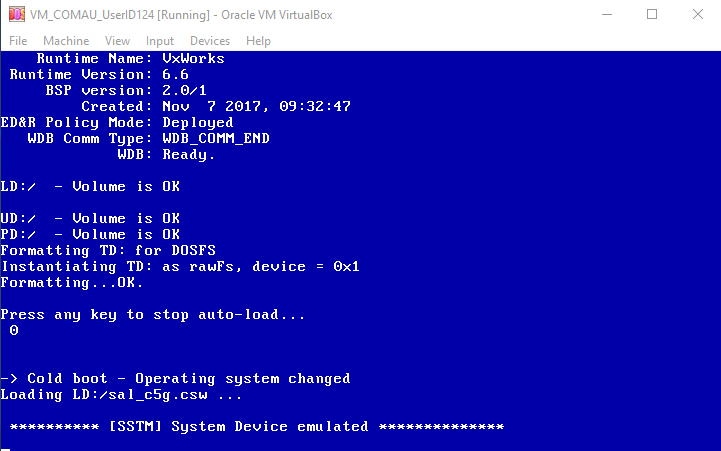
if the virtual machine reports the status below the name Starting or Running, use the right mouse button to click on the virtual machine → Show → a blue background window will appear:

If the PC has low performance or has resources involved in other processes (active programmes) or the virtualisation functions are disabled, it may take a long time to arrive at the status shown in the image.
The virtual machine can be considered ready after the text:
********* [SSTM] System Device emulated ***********
Once this verification has been performed, we can use the virtual TP by launching it through RoboSIM.

Close the blue window using the menu:
EditUnhook the interface.
Do not close the blue window with the Windows shutdown key, as this makes the virtual machine stop.


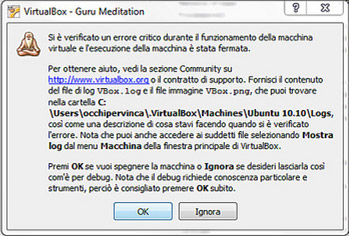
Oracle VM VirtualBox has insufficient resources to operate.

If the PC has low performance or the virtualisation features are disabled, the virtual machine may change state into the status Meditations of the Guru. In this case, the PC is not suitable for using Oracle VM VirtualBox. Try to find a solution on the internet but in any event, even in the face of a solution, using RoboSIM and its components will be very smooth.

Use of the TP to move the ARM